"New" discovery (only took me 40+ years)

Pete_Muller

Moderator
So today, I'm setting up squish band (thickness and angle), and cc's on a KT100. As I'm sneaking up on the dimension, I'm checking the smashed solder (stick it through the spark plug hole and turn the engine over by hand). As I've done for probably close to 45 years, I'm measuring it with either a set of calipers or a micrometer.

As I'm walking back to the lathe, I'm facing something I've owned for 30 years, and I've probably had access to one for 45 years. An optical comparator. It never occurred to me that I could just set the solder on the glass of the comparator, and actually look at the squish band on the comparator (and easily measure included angle and thickness).

It "only" took me 40 or 45 years to realize this.

PM

squish.jpeg
 
Lol. Funny how we forget about using all the tools we learned to use through our lives, isn't it. We have a couple at work but they hardly ever get used.

You probably already know but, the piston crown is curved as well as the combustion chamber in the head. Lots of people just cut the head in a straight line. Just at different angles.

Looks like I see the slight curve of the piston crown on the right side and a pretty straight but slightly angled line on the left.

Pete, I wonder if anyone else thought of this over the years. Or, is it one of those best kept secrets? lol

Brian #89
 
Brian,

Yep... definitely aware of piston crown and head shape. Over the years I played around with the shape of the head quite a bit, and pretty much settled on just cutting the angle that is tangent to the curve at the outer edge of the piston (12 degrees if running an OEM piston). That works out to slight (0.5-1.0 degree) taper if the squish band is the typical width.

The one "feature" in the head that I found can make a difference in how (and where) the head performs on the track is the blend from the squish to the bowl (if running fairly tight squish). A large blend vs. a relatively sharp corner definitely "acts" differently.

"Your mileage may vary". ;)

PM
 
I've always centered the head using the crushed solder method but you have to do it every time you pull the head. There's got to be a better way.

I've seen these head washers with a locating taper on one side that will center the head or at least make it repeatable. I've tried to center the combustion chamber on the bolt pattern before cutting but those holes are cast and all over the place. Are the people using those washers just fooling themselves or is there a way to set it up so they actually center the head?
 
Well... there is always a way, but it comes down to whether it's worth the effort or not. :unsure:

I'm not sure relying on stud location is good enough either, actually. They are typically not a perfect pattern. I suppose the ultimate way to do it would be to drill through the head (well outboard of the studs), and sink 2 or 3 pin holes through the head and into the top fin of the cylinder. I've never done it, but that's how I would probably approach it if looking for perfect centering.

I generally check front, back, left and right with the solder as a final check when I'm assembling one.

PM
 
If you're wanting to mark a position for future head fudging location, couldn't you mount the head without the piston in and look up the cylinder to align and mark externally the head where you want it to be?
 
We had our second yammi done with a "bathtub" head feature for flame propagation.

proly wasn't a good idea but that's what was done and it ran ok
 
^^^^ When I had the cylinder off to hone for a piston, I bolted the head to the cylinder, centered it as best I could and then I drilled two holes on each side of the head. Used two long 5/32 dowels and that allowed me to put the head back on the cylinder each time.

Worked great.
 
Another possible solution would be to step the head just slightly so it drops into the copper head gasket just a touch, and use that for alignment. Of course this could be "chased" back up the food chain a bit... skim the head gasket recess bore to make sure it's concentric with the bore, then probably make a head gasket from scratch so it's absolutely concentric ID to OD, and then the head gasket would need to be the correct thickness to nail the squish dimension. Definitely doable.

Pinning it like Chris did though doesn't lock things into a specific gasket with precise head shape, so that's a plus for the pinning method.

PM
 
Look at the Italian heads, for instance the HPV, K 71, they don't cut the head, but they have 11 mL just the same. I've been advocating cutting the barrel on the KT100 to get the cc for 30 years, nobody listens.
 
Well, I listen... I just choose not to do it. ;)

My reasons:
I've never seen any proof by anyone of a performance gain. Additionally, pulling that amount of material off the top of the liner generally means some material needs to be taken off the top of the aluminum outside the liner (unless the head is machined away outside the OD of the head gasket). As it is, the head studs (especially the 2 on the exhaust side) are already a weak point in the Yamaha, so I'd prefer to keep that one extra thread for the stud to screw into.

There aren't many good (pre-die-cast) heads left in the world that have the original deep step either -- almost all have been cut in some way.

PM
 
Did this test years ago with two engines and four heads, built them both to IKF specs and dynoed then cut the cylinders down for clearance and CC to 11,4 no gain or loss other than more work, now across the sea they sent engines close to spec and ran a dykes ring which maybe the Italians did cut the cylinder down to get close to the piston and ring to start with then they cut the head to fit. When Yamaha came out you couldn't hardly do anything to them then in 1984 or 5 IKF changed the rules so we could cut
 
Not directed at you Mike... you've been down this road more than most of us.

But... the engines Al is comparing are obviously very different designs.

The Italian engines from that era all have a drop in liner with a very thick top flange/hat that "shoulders" on top of the aluminum cylinder (ala: K55, K78, K80, K35, K99, K11, etc.). That shoulder (since the liner is fully machined before being dropped into the cylinder) is a very convenient method to perfectly center-up the cylinder head on top of the liner. I wish Yamaha did that, but they chose cast-in liner, most likely for the reduced cost and speed of production.

I suspect that IAME continued that design because they had done it that way for a long time and the system worked well, not because they were searching for a breakthrough on heat transfer.

So yea... I just cut the head on a Yamaha to get the squish and cc's I want, and don't mess with the top of the liner unless I'm just skimming off .001" or .002" to make it perfectly flat.

PM
 
^^^^ When I had the cylinder off to hone for a piston, I bolted the head to the cylinder, centered it as best I could and then I drilled two holes on each side of the head. Used two long 5/32 dowels and that allowed me to put the head back on the cylinder each time.

Worked great.
Were the holes out in the fins or in between the studs next to the liner
 
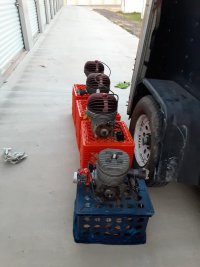
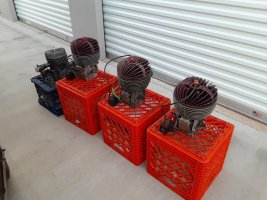
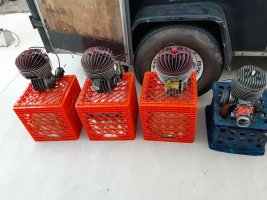
Don't forget some of the Italian engines. like some TSL PCRs, have 2 extra bolts that attached the head to the cylinder. Might this be the reason for them, it is well centered, or maybe to help from getting loose with vibration? I forgot if it was on the 95s or 98s. I think it was on the PCR TSL 98s. Have to check my engine collection again.
 

Attachments

  • 101166244_10219573592222666_7148717212990177280_n.jpg
    101166244_10219573592222666_7148717212990177280_n.jpg
    87.2 KB · Views: 45
  • 101382944_10219573592022661_3861560638627119104_n.jpg
    101382944_10219573592022661_3861560638627119104_n.jpg
    91.7 KB · Views: 43
  • 101910788_10219573592462672_4471643172312711168_n.jpg
    101910788_10219573592462672_4471643172312711168_n.jpg
    95.4 KB · Views: 43
Rain, you should leave those engines at my house this summer when you go to Spain they would be well loved LOL . Hope to see ya before you leave for Spain this covid is kicking my butt.later Chuck.
 
Rain, you should leave those engines at my house this summer when you go to Spain they would be well loved LOL . Hope to see ya before you leave for Spain this covid is kicking my butt.later Chuck.
Glad to hear you are feeling better. Practice was great on the Wankel this weekend. I am sure you would take care of my engines, lol. Kind of fit the colors of several karts.
 
Back
Top